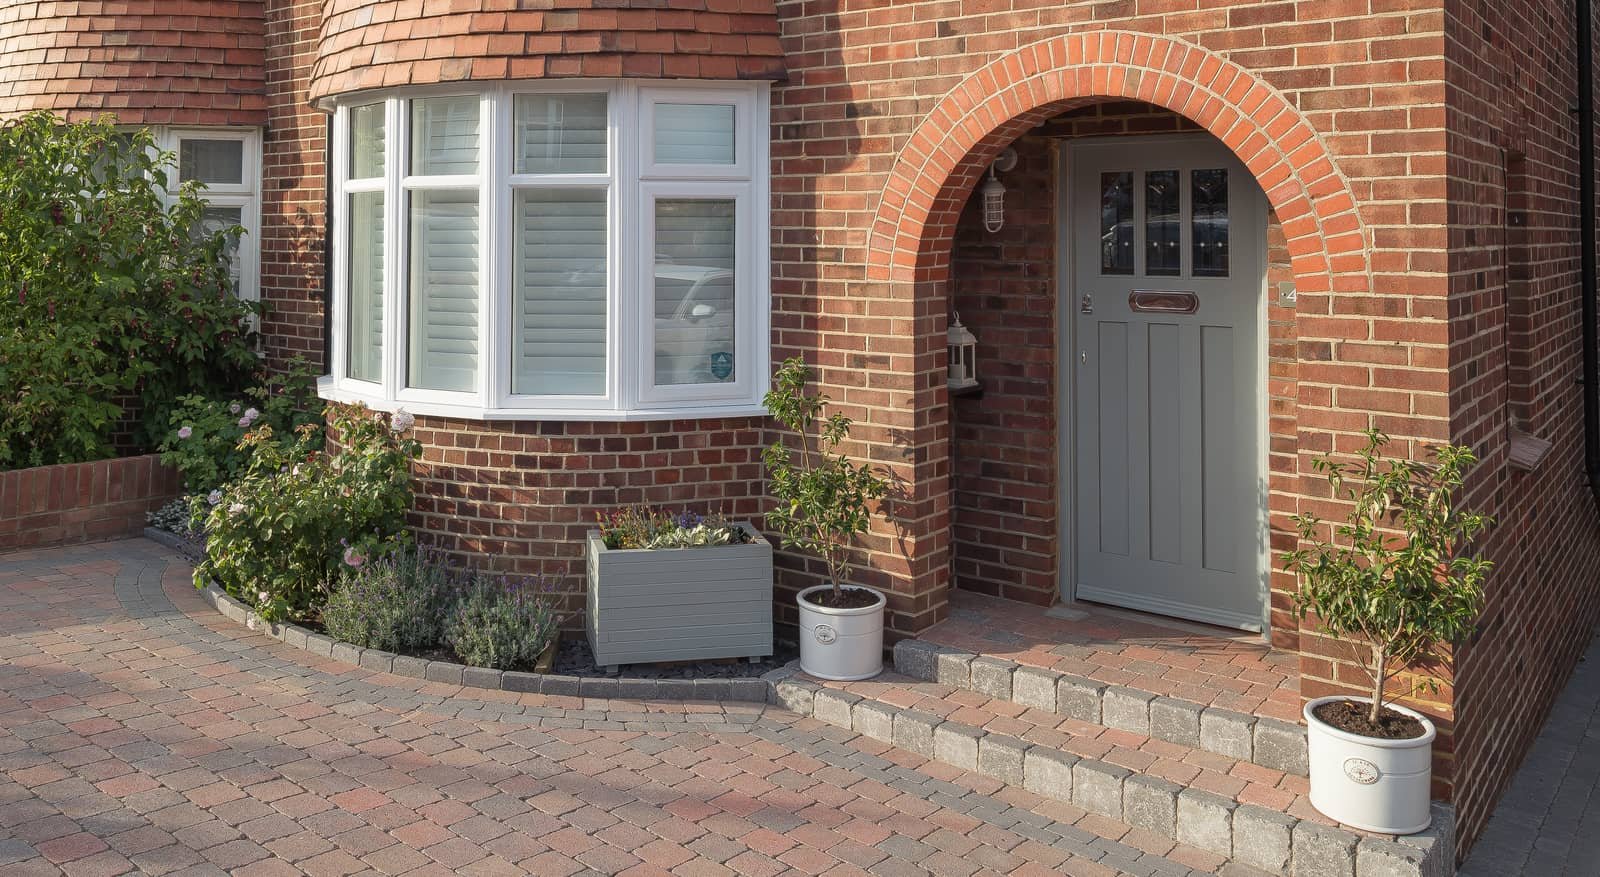
How to Renovate a House: A Step-by-Step Guide and Where to Start
How to Renovate a House: A Step-by-Step Guide and Where to Start
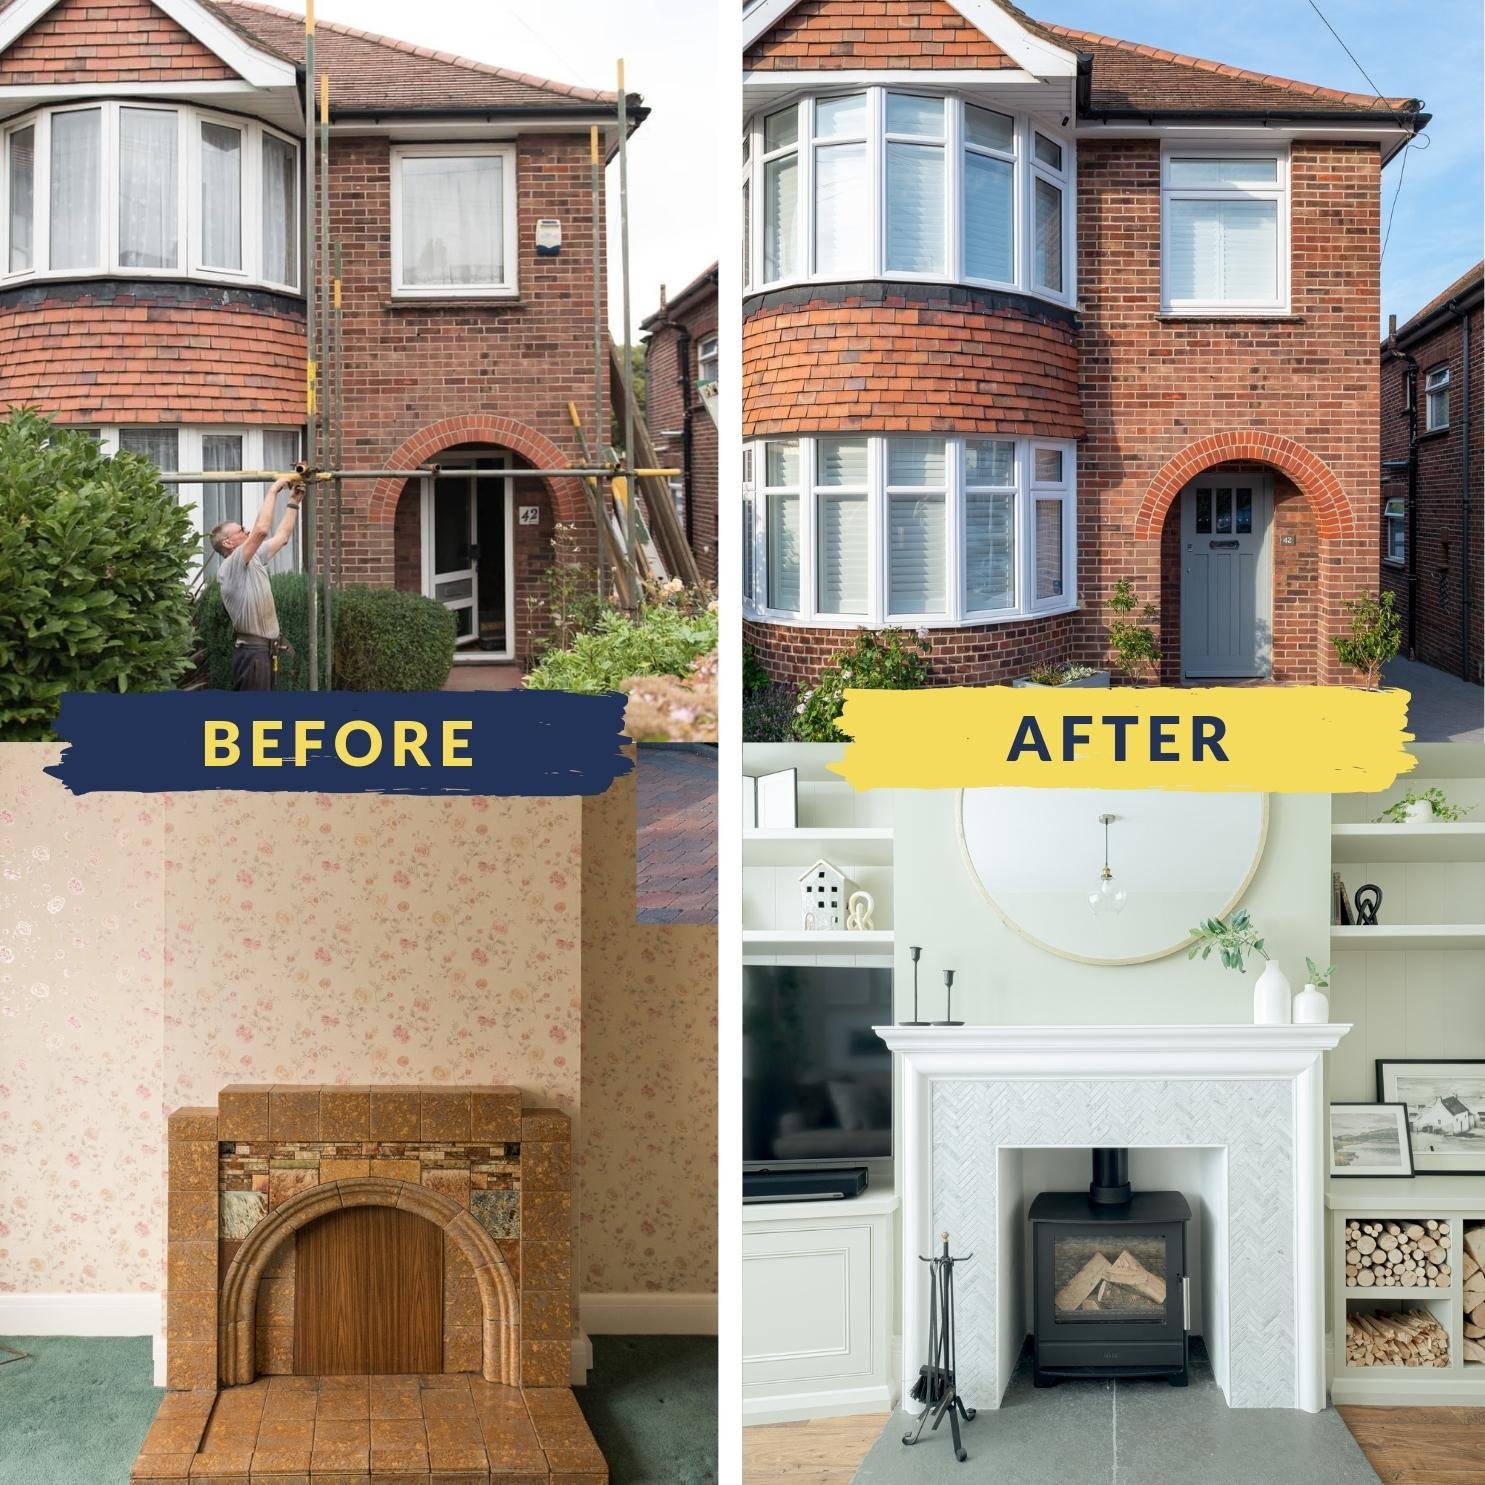
Hello! We're Fi and Neil a couple from Brighton in the UK. We completed a full 1930s house renovation & guess what? We managed it pretty much under budget!
Embarking on this house renovation journey has been like riding a rollercoaster full of surprises🎢
Imagine finding pre-war newspapers hidden under carpets, electrocuting ourselves, getting permanent tinnitus & having to scrap our £80K extension plans at the eleventh hour – yes, we've been through all that! And we survived …just about 😅
So, if you're thinking "I want to renovate my house, where do I start?", or if you're puzzling over the steps to renovating a house, you're in the right place.
We're here to share our experience, step-by-step, with handy tips on how to renovate a house.
A word of warning for your renovation!⚠️
We were chatting the other day about how to ensure your renovation is successful.
The fact that you discovered this guide is already a total level-up for your renovation project, but you’re going to get overwhelmed & start sweating 😓 about the complexity of the project ahead if you try and consume it all now - so join our free bitesize renovation email series now before you get into the weeds!
With that out of the way, let's dive into the world of house renovations and discover where to start when renovating a house.
Renovating a house step by step – where to start
Back in 2016, we were right where you are now: about to make the brave decision to take on a property to renovate.
We fell in love with a 1930s house that miraculously came onto the market within our price range, but we only had a very tight £80,000 to make it our dream home. And it needed EVERYTHING changing. There was no central heating, every wall and ceiling had dated wallpaper on it, and the carpets were so old they were literally crumbling under our feet!
To top it all off, we were oblivious to how much it would cost to renovate…
Over a glass of wine in the evenings, I remember sitting in our new fixer-upper with Neil, talking about the worst things:
What if we run out of money and are left living in rubble?
Where do we even start?
What if we regret our decisions and waste money?
Or unearth some budget-shattering, project-destroying issue we can’t fix?!
For two very new renovators at the time, the project felt insurmountable. But guess what?
We did it. And we learned SO much during the process. We documented every single inch of the dust, sweat and tears it took, right here on this blog, including the mistakes, to support other first-time renovators. I then trained to become an interior designer, frustrated at a lack of support available to renovators at the time, and Neil and I now deliver online courses to first-time renovators who want our help to plan their projects.


Your family and friends are probably saying, ‘don’t touch it,’ but don’t listen to them. With the right support and if you’re sensible with money, you can do it! You’ll make this house your dream home…
Step 1: Finding your property to renovate
You might be looking at properties to renovate as I write this to you, or you might have your heart set on the one, you’re just waiting for the keys.
When Neil and I were looking for our place, we initially didn’t know it was a renovation we’d end up with. Were you the same? Or did you know it was a property to renovate you were looking for?
We called ourselves reluctant renovators (although now, we’re addicts!) because we were forced to buy a property to renovate due to rising property prices in the South East. Our options were:
Option 1 - Buy a house that was already decorated with 90s decor for about £400K
Option 2 - Buy a house with 60s decor that needed renovating for around £330K and use the £70K equity to make it our dream home.
We considered our options very heavily, as we always do, and decided we’d rather make a property ‘our own’ than buy one to someone else’s taste and have no money left to redecorate.
So the property hunt began.

What to look for if you’re viewing properties right now:
A property with good ‘bones’ – as I like to say – that means…
Decent sized rooms
The potential to extend/convert if that’s on your wish list in the future
Heating/Electrics/Water at least already installed! Especially if you plan to move in straight away and it’s edging closer to winter – we made that mistake 🤪 Cue us huddled around a plug-in electric heater during -2 temps!
Period features like chimney breasts, alcoves, stained glass windows, and original cornice. OK, it’s a nice to have, but if you’re tossing up, I’d go for character above all. That said, you can always reinstate features that have been ripped out
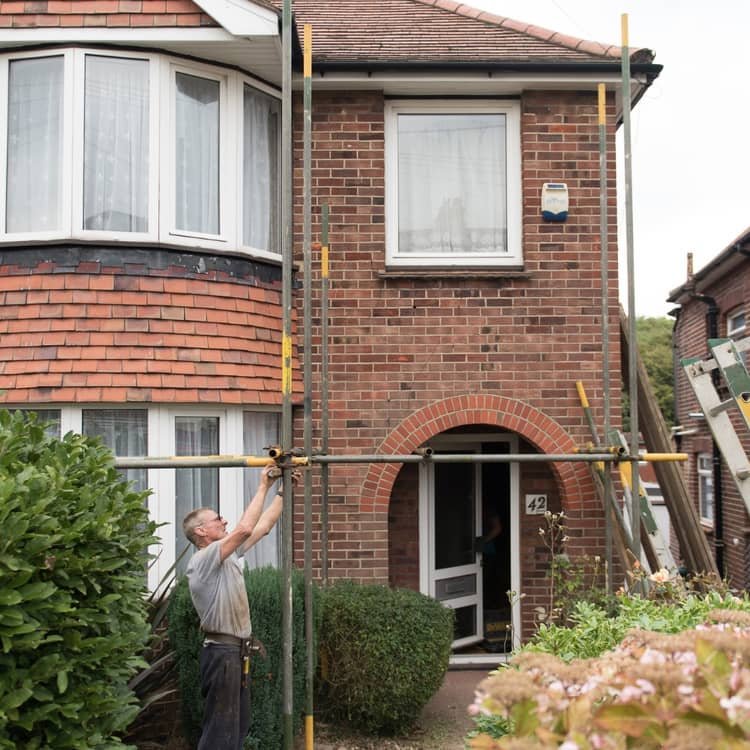
our house renovation - Before

OUR HOUSE RENOVATION - AFTER
What we learned quickly:
Bring an experienced contractor to your viewing. We slipped ours £50 to say thanks
They’ll look out for structural issues or pricey problems before you put your offer in
They’ll ballpark the work you want to do so you know you can afford it
They might even tell you whether it will be easy/difficult to get planning approval
A full Building Survey is a MUST
In our opinion, Home Buyers surveys just aren’t detailed enough
You need to enter into this refurb with your eyes wide open, aware of all the potential house renovation costs that may be lurking
We actually asked our surveyor to ballpark remedial costs, which helped us negotiate with the sellers
Negotiate remedial work off the original asking price – we brought our original offer down by £23,500 simply by obtaining a full building survey and estimates for the work. That was a tidy sum we put back into the maintenance of the building.
Understand the ceiling price in the area
What is the property for? Are you flipping, or will it be your forever home? Either way, you need to be aware of whether you’ll make your investment back if/when you come to sell
If it’s your forever home, the location is perfect for you, and you can’t see yourself living anywhere else, you might be comfortable going above the ceiling price, and that’s OK
Just clarify your goals early on
Be smart about what’s feasible
It sounds obvious, but never buy a property and worry about how you’ll have the layout later – you could be left very disappointed if work can’t happen due to feasibility or for legal reasons
If you know you want to extend or build into the loft, find out if it’s feasible now by either conducting a viewing with an experienced general contractor, structural engineer, or architect or give your Local Planning Office a call
I’ll give you an example, the property we bought can’t really be extended larger than the current size because the floor height is about 8 steps above the back garden height. We’d have to drop the floors internally to do a rear extension with bifold doors. I mean, it’s doable, but not to our taste or budget.
Some people think you can knock up a loft conversion in any house. Nope! The property needs the right head height, so check this with an experienced contractor or your local planning office before you buy
Look at the neighbour’s floor plans online
Usually, properties nearby will be built with a similar footprint to yours, so you can tell whether loft extensions are feasible just by looking at whether your future neighbours have done it
The same goes for all other developments like driveway installations, garage conversions, and double-story extensions. Have any of the neighbours done it? Chances are you’ll get your plans signed off, too if they have
Equally, don’t let their properties keep you ‘thinking small’. If you’d love an apex window in your rear extension, and all your neighbours have gone for flat roofs, investigate it as a possibility. Times change, and budgets are different in every household.
Articles to help you during this phase:
Step 2: You’ve secured your mortgage, and your offer’s been accepted. Now get excited, but number-crunch like your whole life depends on it!!

The hard truth is, you might think £100,000 is enough to get everything done until you need to double it 😳
Don’t believe the Homes Under the Hammer promise that you’ll get the perfect 3-bed reno complete in under £50,000. It just doesn’t happen in today’s world unless you’re a contractor doing the work yourself and paying only for materials.
Before we started working with renovators 1-on-1 and in an online format, it was common for people to guess the costs involved and then run out of money when their extension or loft conversion got to first fix.
I’ll let you in on something. It’s more likely you’ll run out of money on the ‘design/finishing’ bits, like the lighting, worktops, kitchen, furniture etc, than the actual renovation work. This baffles me. I have to say. Because prices for these are all online and available for people to factor into their budgets from the word go. Yet people forget to.
To avoid any costly surprises:
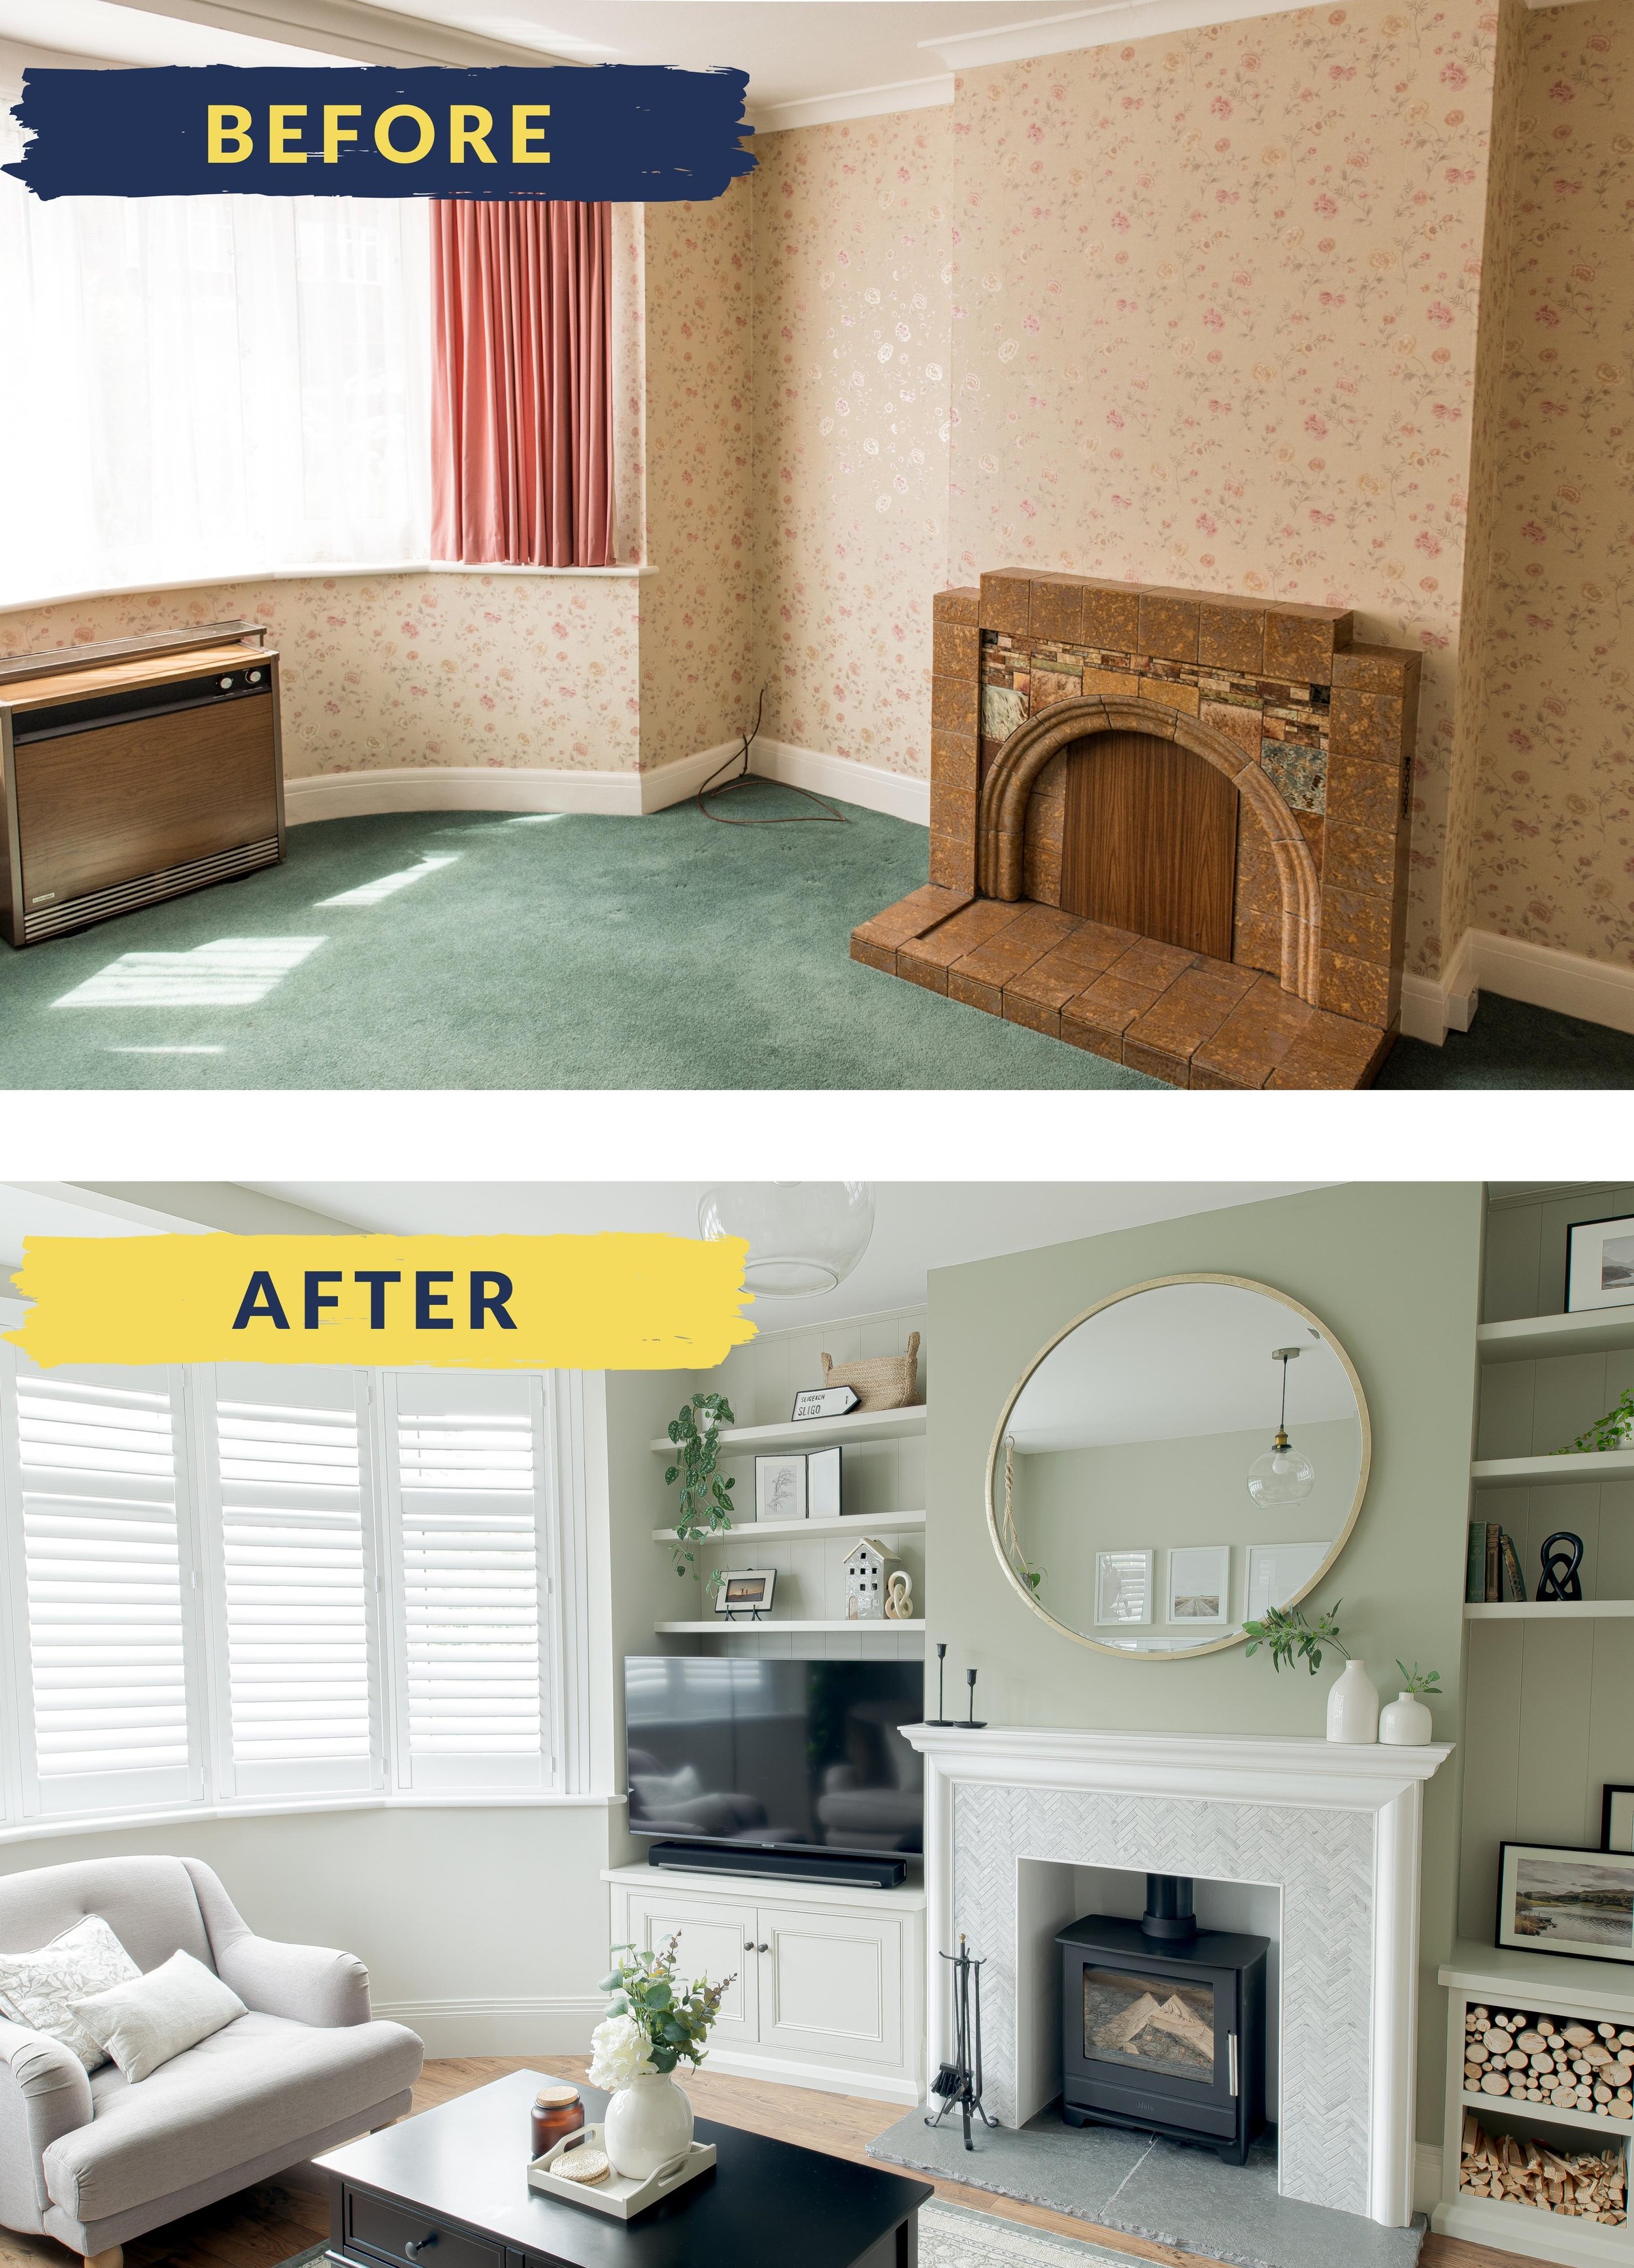
OUR LIVING ROOM BEFORE AND AFTER
Set a very healthy contingency
Have access to funds 10–20% higher than your overall budget
Have a Plan A and a Plan B
Consider phasing the work. It’s exactly what we did, and many of our students are too. Jen from our Reno Club shared a DIY Kitchens review on here recently, and her plan is for the kitchen she’s just completed to become her utility room once they finish their extension
Remember, renovations can move as fast or as slow as you want them to. The only thing holding you up could be contractors, but you’ve got a lot of planning to do before they knock on the door, so use this time wisely
Don’t make the mistake of buying the property before you’ve got a clear idea of how much it will cost to renovate
You need to go in with your eyes wide open, as I said before
This stage would be the perfect time to begin working through the first module of the How to Renovate a House online course if you want financial peace of mind
Factor in your finish costs, not just structural
Who wants to spend thousands only to be left with a mediocre finish?
Budget for every known cost from the start. Yes, including sockets and switches, door stops, skirting boards, the lot!
Factor in accommodation costs
We explained in our What we wish we knew about renovating guide that renovations are hard to live and work in. Our Reno Club students (particularly those juggling childcare, work and renovating) are budgeting brilliantly to allow for comfort and renting while the work happens
Will you live in, live with family/friends or rent?
Understand early on how you can bring costs down
Another reason to read our renovation guide is to learn about how to reduce your costs and prevent them from spiralling
This forms a big part of our renovation online course too. We work hard to ensure students bring their renovations in on budget and show them ways to manage their projects affordably
I tend to say you should learn as much as you can from people who have renovated before you to prevent you from making their mistakes (that’s why we opened up our Reno Club private community as part of our course. Students have found it really useful to connect with others going through the same thing.)
Conduct any suggested surveys
We know they can feel like burning money, but just get them done for insight and peace of mind financially
When we got our building survey back, our surveyor recommended a CCTV drainage survey and asbestos survey. For the sake of a few hundred pounds, we’re so glad we did them. We were able to budget for asbestos removal and remedial works to the drains (and got quotes for it knocked off the price of the house)
Free Guide: What we wish we knew about renovations before we started
Feel clued up and confident before you begin. We’re sharing:
Expert tips to save money and avoid budget overruns, giving you peace of mind throughout the process.
Strategies for finding reliable contractors who are easy to communicate with, so you can build a positive working relationship.
What order to do work in, making it easier for you to stay organized and on track (Includes downloadable timeline you can save or print)
Articles to help you during this phase:
Free Guide: Download A Survivor’s Guide to Renovating – find out if you’re really ready for this crazy phase of your life and get preparation tips.
Step 3: The removals van is booked. You’ve finally got the keys! Now what? Firm up your layout, and don’t get an architect until you know you need one!

I use sketchup FOR DRAWING FLOOR PLANS but there’s lots more affordable / free tools
We made this expensive mistake early on and don’t want the same for you!
Read our post on Why you shouldn’t begin your project with an architect, do this instead for the full story.
Anyway, the day we got the keys, I won’t lie. There was a fleeting ‘shit, what have we done’ feeling as we walked around the property we now owned. Reality hit. We were made aware of just how much needed changing.
It was like an excited apprehension. Like a gigantic ‘gulp and hope for the best’ feeling. I wonder if you’ll experience similar?
Here’s where you need to swing into action, though. I don’t mean act fast by any means. I mean, you need to make small incremental and careful progress every day while you have the momentum and the property right in front of you.
What we advise you do at this stage:
Take your before shots of every room + exterior
Do this before you do anything! You need a record of how far you’ve progressed to give you hope when you’re about to give up!
Plus, it’ll be fun to show the grandkids how you renovated an old house to become your new home.
Start a wants + needs list
We’re ALL about getting the practicals down first when we design property, and salvaging or reinstating any period features
This is one of the most powerful exercises that we ask our students to do, which helps them form a solid brief to banish that feeling of overwhelm
By adding to your list(s) over days/weeks you can get peace of mind that you’re doing everything with careful consideration and you ensure nothing is missed
Draw up layout ideas – lots of them!
Every renovator or homeowner needs to do this step, especially if you’re hiring an architect (read our post on why)
I like to use Sketchup as my software tool of choice for floor planning, but it’s because I need it for client work. It’s a steep learning curve and not necessary for new renovators when there are great tools like FloorPlanner, Magic Plan and DIY Kitchens 3D tool planner to get stuck in and work quicker with
Be scrappy! Sometimes quick sketches as you chat with your partner or contractor for ideas can be every bit as useful
Always take your ideas into scaled format (whether it’s pen/paper or online) once you’re starting to firm up decisions. I’ve found drawing to scale to be an essential skill to learn as a renovator, which is why it’s one of the first things we teach people in our online courses – you get a much clearer understanding of flow and whether things will fit
Sit on your ideas as you live in the property and role-play the layout in any way you can, changing things that don’t work
If you’re looking for advice on how to approach an Edwardian house renovation, a bungalow renovation or a 1930s house renovation, then we have specific guides tailored to the period of your property
Define the design/style you want your home to be
It’s so important that you start to develop a strong vision as early on as possible – nobody else can create one on your behalf. You need to know the vibe and style you want as a minimum
Even if you’re hiring an interior designer + project manager for a renovation (I know many of us don’t have the budget) just understand that it still requires a lot of input from you to make the £100s of thousands of pounds you’re investing end up looking fab not ‘meh’
I don’t mean to be harsh. It’s a reality check. You need to get clear on what you want the look and feel to be in every room and how you’ll reconfigure the spaces to optimise for light, storage, practicality, beauty, relaxation etc – and bring it in on budget while retaining or enhancing the value of the property
Hiring an interior designer can help with some heavy lifting, but it’s far more important to sharpen your skillset if you’re feeling overwhelmed or struggling with layout and design early on
At this stage, it would be the perfect time to start our Home Design Lab program (it’s how homeowners are getting results like this 👇🏻)
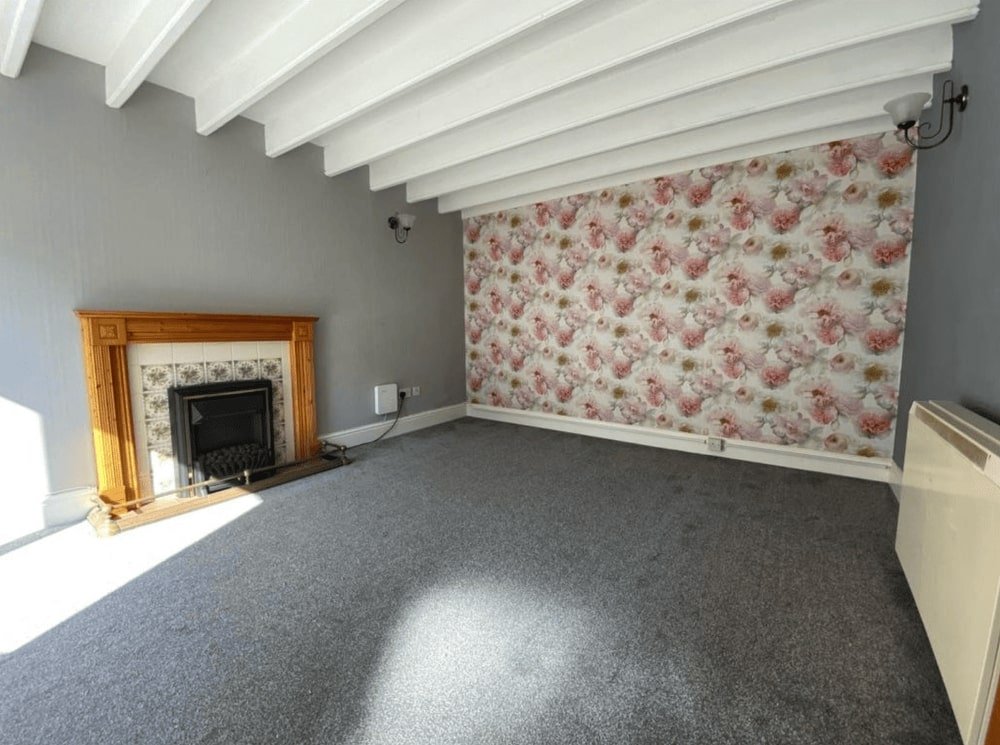
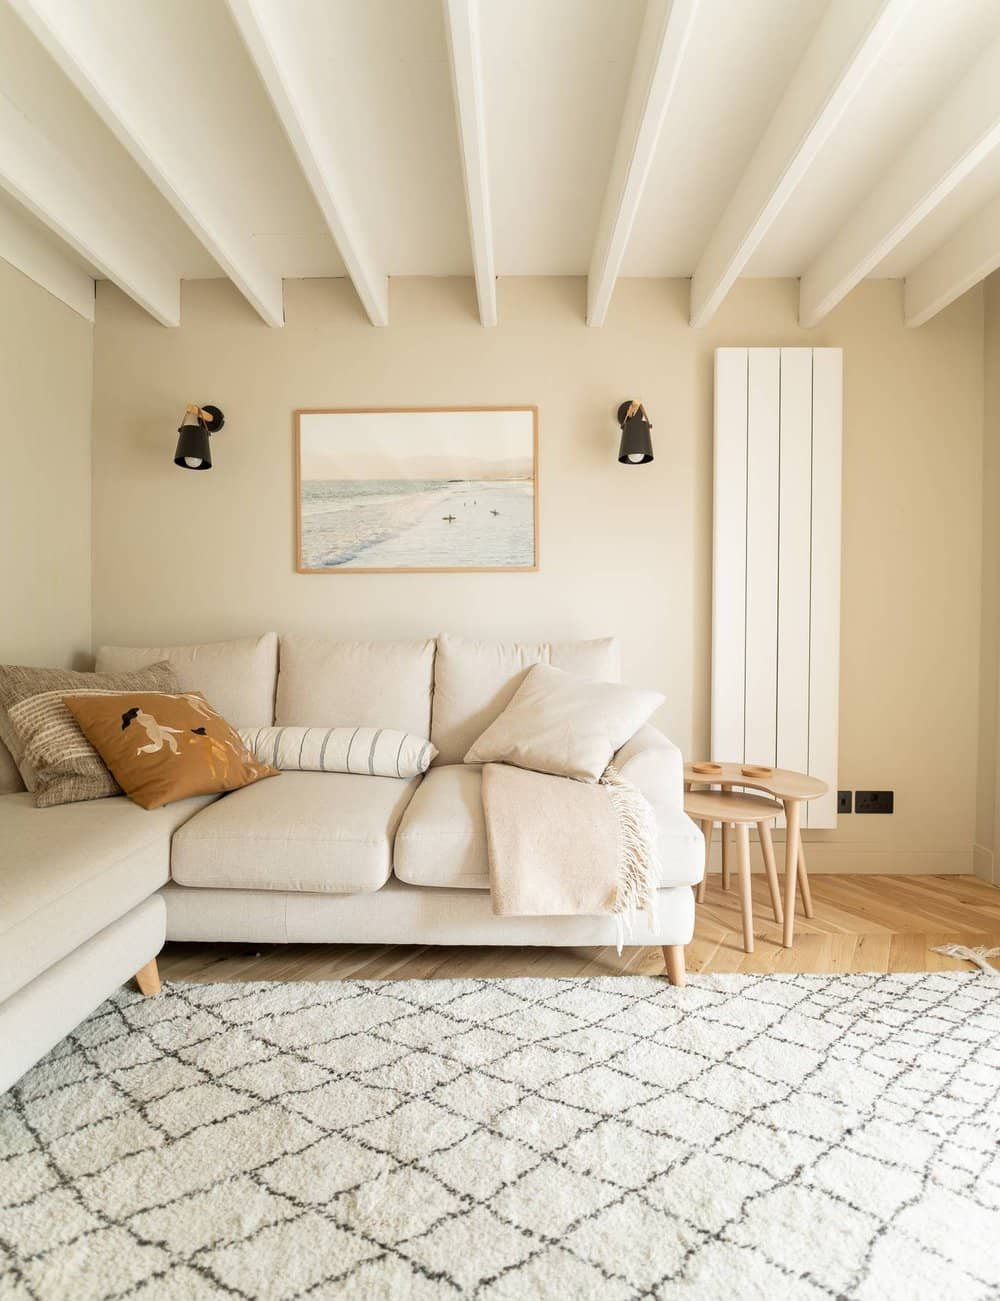
Try and stay off Pinterest …for now
Unless you’re being intentional with it, and you know what you’re looking for, aimless pinning is a recipe for magpie tendencies. You want boho one minute, scandi the next. That can cause a mish-mash of styles with no sense of flow that you need to avoid.
I’m all about designing a property that’s YOU. Try to determine what’s YOU, not what’s trendy (we have lots of exercises to help unravel what your tastes are so you end up with a home you love)
Want to start planning your dream home?
Join thousands of others, controlling costs, reducing stress & saving thousands.
Enhance your home planning and get your dream home the easy way.
Get notified for our next renovation online course enrolment now!

Step 4: Hire your architect (if you need one), confirm your interior + exterior plans + submit necessary planning applications

You’ve investigated and started to clarify what you want and need from your fixer-upper, and now you’re ready to put your ideas into action – and get them enhanced and drawn by expert minds like an architect or interior designer.
Lots of renovators choose to form their interior design and exterior plans in a piecemeal way, but I recommend working holistically if you’re serious about getting your interior layout to flow well with the additional space you’re building or reconfiguring.
My top tips for this stage:
Find an architect who designs properties that you’re aspiring to create
It’s far more likely you’ll have a good rapport, they’ll be the right budget to hire, and they’ll plan a build that’s within your budget too
Remember, there’s a lot of work to do before you part with your cash and hire an architect. We’ve put together a step-by-step action plan to follow in our home renovation online course
If you’re not sure whether your project requires an architect or not, read our architect costs post for a handy flow chart to find out
Work towards drawing up a detailed layout + design plan for your kitchen, bathroom, loft conversion and/or extension spaces
Understanding what furniture, appliance, light, sink, showers, etc, will fit where as early as possible is so important. You’ll ensure there is enough space/it’s feasible and prevents any heartbreak later when you come to realise you can’t have that dining table because your extension isn’t built big enough
Loosely firming up room layouts will, at the very least, give you certainty there’s space for everything you know you want (prior to submitting any planning applications), and at the most, you’ll be able to see possible tricky design situations before they arise, change course, without breaking the bank or compromising the overall design
Planning a renovation holistically is something we never knew to do until we made a host of mistakes! That’s why I wrote all about the common mistake renovators can make and how you can avoid it.
Step 5: Select and invite contractors to quote, agree costs and a start/completion date and wait for any applications to be approved

This is arguably one of the most stressful steps in renovating a house. You’re so close, but so far. You’ve got all your plans lined up. You just need to get approval and the right team to execute it for you.
Our advice for this step in the process:
Be clear about your project + requirements
You’ve probably heard from family + friends how hard it is to find available contractors right now. Some don’t even answer your call or send quotes
The biggest piece of advice we can give if your timeline is slowing down because you’re waiting on contractor’s calls is to make your project sound exciting and like it’s going to benefit them
Contractors do this work day-in-day-out, and they’re people at the end of the day. They want to work with happy clients they enjoy problem-solving with, and if a job sounds up their street, they’re more likely to do it
So show your personality and tell them why you’ve chosen them to come and quote, get them excited about working for you. It’s like hiring someone on your team at work.
Compare quotes fairly
In our online course, we have a popular PDF download explaining how to effectively obtain quotes, ensuring you’re asking the correct questions and then, importantly, how to compare them and make the right choice for your renovation
I can’t stress enough how important this step is to get right. Making the right hire could be the difference between a terrible or successful renovation – which is why we’re so passionate about helping students with a framework showing them how to hire the right people for the right job.
Put contracts in place and protect your project
It’s so important to dot your i’s and cross those t’s before you start any renovation work. Who is liable if things go awry? Are you insured?
We wrote about JCT contracts recently for mid to large renovations, which is a good avenue to explore
Don’t just wait around. Keep progress moving.
When you’re sick of looking at that avocado suit, all you want is for work to start rapidly – so it’s frustrating when it gets held up
Don’t allow this to get you down though!
You have SO many decisions to make when the build begins. Use this time to source products, tiles, taps, worktops, furniture, you name it.
You don’t have to buy the products now unless you have a dry, damp-free place to safely store things. But get samples in and find the companies you resonate with at the least.
Believe me, product sourcing takes an obscene amount of time! That’s why our online courses offer supplier directories to introduce you to reputable companies to work with (many we’ve used ourselves), and we offer you ways to track your spending and product lists
Step 6: Let the renovation work commence!
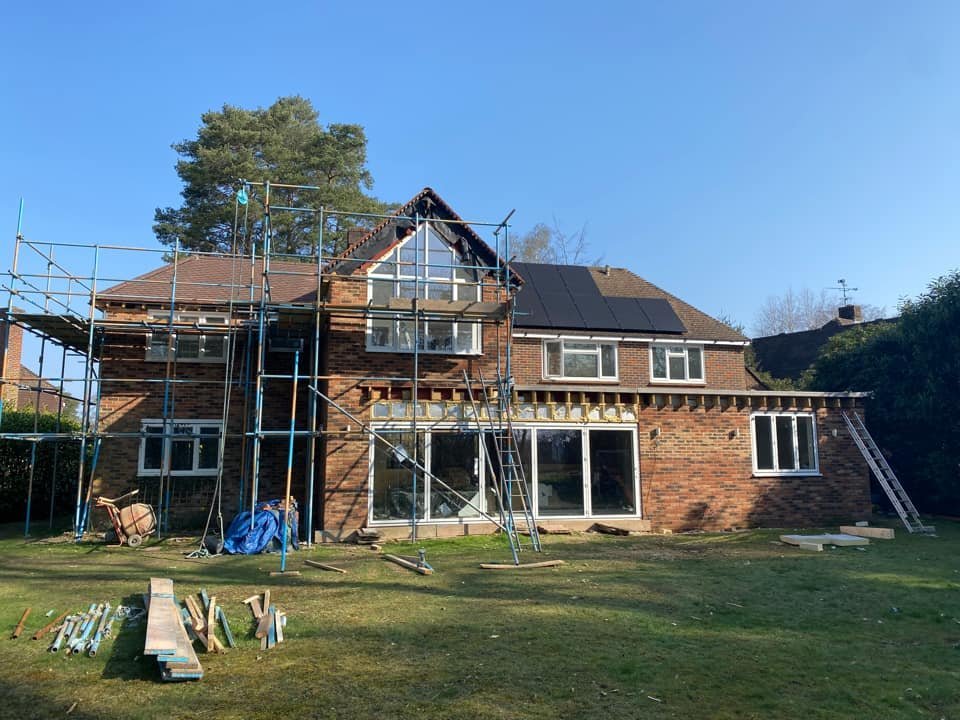
ONE OF OUR RECENT PROJECTS GOING INTO CONSTRUCTION IN SURREY
It’s D-day, the kettle is on the boil, and the builders are knocking. Finally, work can begin 🙌🏻 This next phase needs to involve great communication, ensuring you reduce stress and manage the team and outgoing costs effectively. And if you’ve done the right level of planning prior to this, you’ll sail through it all. I promise.
Do you want to know the order a typical renovation runs in? We share the exact steps with renovators in our free Survivor’s Guide to Renovating. Look out for Day 3 for each step of the process from here.
I hope this was useful?! – Neil and I would love to help you with your project
Renovations have been somewhat glamorised in recent years, but as an experienced renovator and an interior designer, I can tell you there’s more dust, sweat and tears than people expect going into it. Yes, it’s 100% worth it, but if you don’t feel clued up, it can be a really stressful period of your life.
Neil and I started our company to help new renovators ease the stress, prevent costs from spiralling, grow their confidence in the design and project management and get the home of their dreams – all within budget.
If you’re on the same page as us and you like the idea of renovating a home that’s going to enhance your life, then we’d love to invite you to the next opening of our renovation online course.
Take a look and see if it’s for you.
Thank you so much for reading this, and very best of luck with your renovation project 💛 You know where we are if you need help!
Fi (+ Neil)
WHAT WE WISH WE KNEW ABOUT RENOVATING BEFORE WE STARTED
Grab our Free Survivor's Guide to Renovating and get up to speed!
👉 Tips on cutting costs, getting trustworthy contractors & delivering on time
👉Let's make your renovation less stressful, more fun and with fewer compromises
👉 Confidence to do things right - don't regret wasting money
Other posts you may like:
Interior Designer & Renovator
Specialising in affordable renovations


